
MSSQL Server Installation Guide
Published date: 03/06/2025
MSSQL installation
Let’s dive straight in to the topic -
To install MSSQL server, follow below steps:
- Every software has it versions or editions, therefore you need to check what version you want according to the current needs. Here, we’ll install SQL server 2019.
- Download SQL server installer file from Microsoft website:
https://go.microsoft.com/fwlink/?linkid=866662 [Developer Edition] - On double-clicking the downloaded file, it’ll show below window showing different ways of installation:
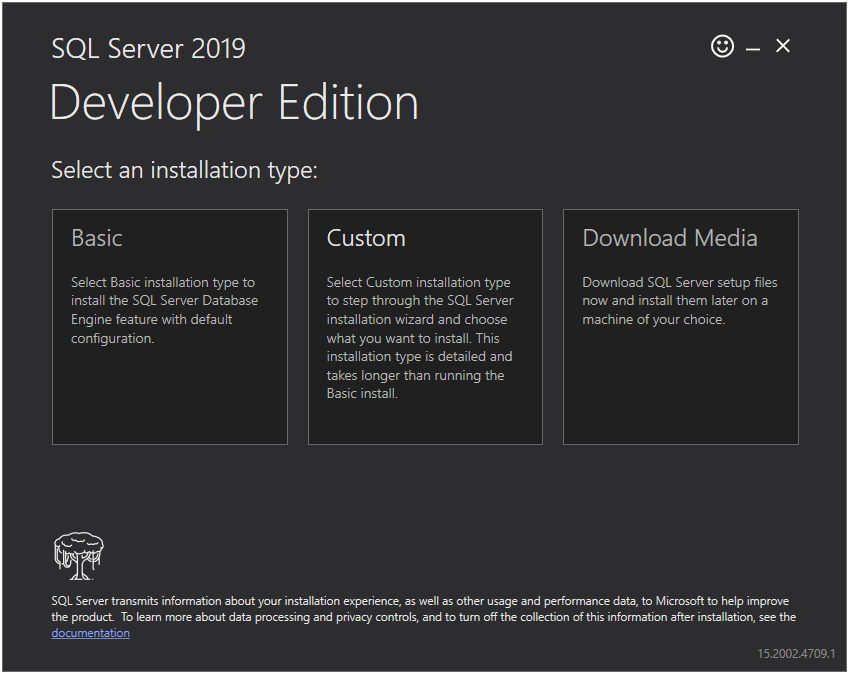
- Basic – on selecting this option, it’ll install basic feature of MSSQL server. It’ll not a full version of SQL server.
- Custom – this option will take you through all the feature options available in the MSSQL installation therefore you can analyze and select according to your requirement.
- Download Media – in technical aspects, this option is similar to second one. The only difference is you can download the software first on local drive before installation. This is helpful when you have weak internet connection. We’ll be going with this option in this tutorial.
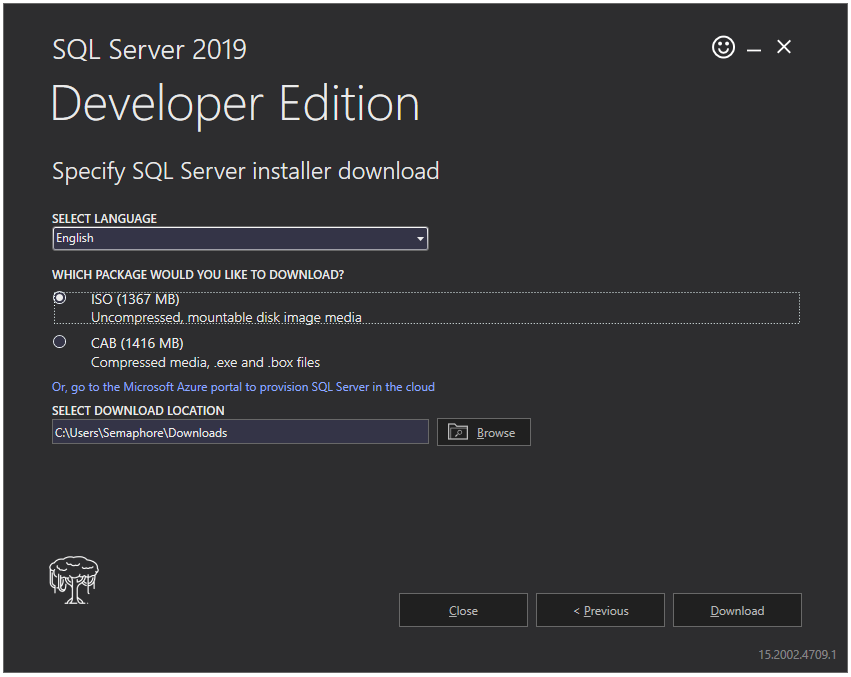
- In the next window, select language, ISO image option (we’ve selected this option as we’re using it in this tutorial), location where you want to download the ISO image file and then click on ‘Download’ to starting download.
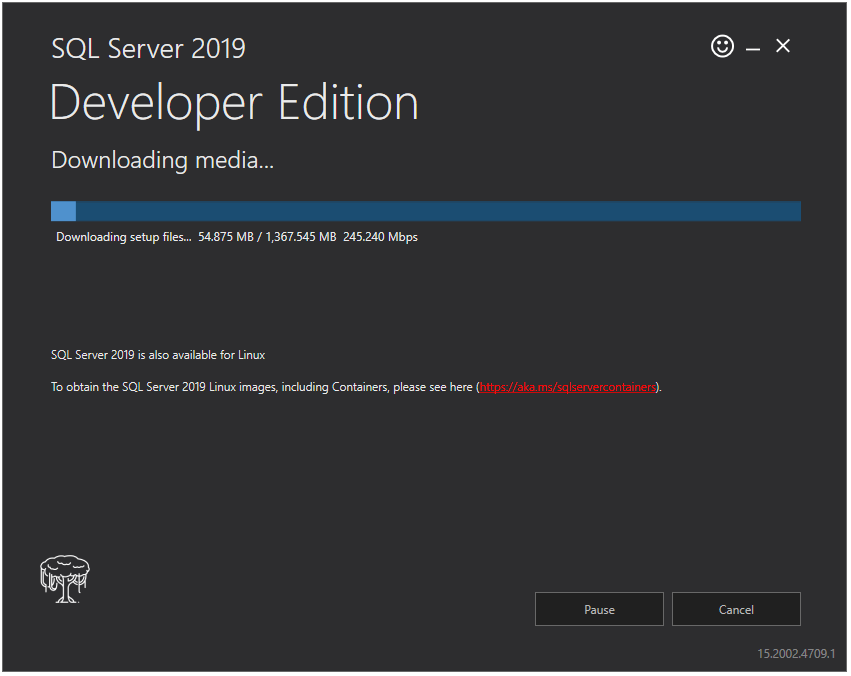
- You should see below screen during downloading process -
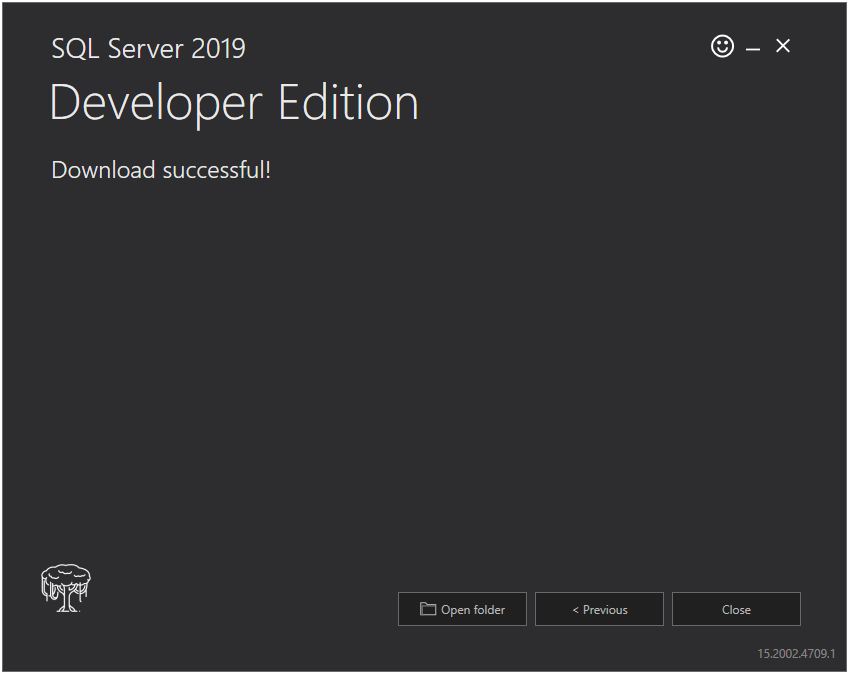
- Once download is finished, you’ll see below screen, select open folder to open the downloaded file in folder explorer -
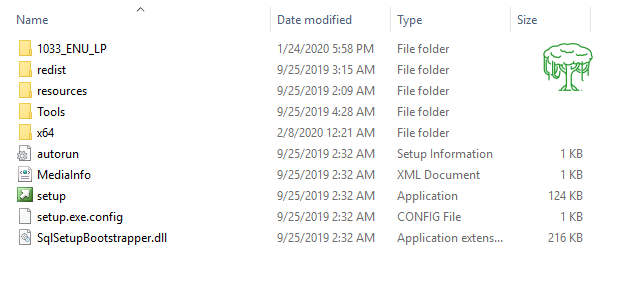
- You will see below file. Double-click on it and mount it. Once mounted, open the folder and double-click on setup file:

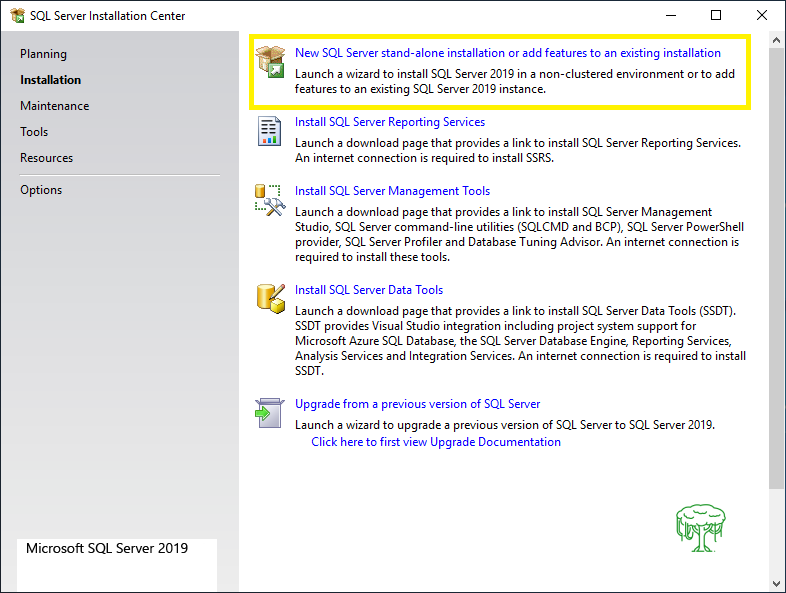
- It will open SQL server Installation Center as shown below, click on Installation on left menu and the click on first option on right hand side-
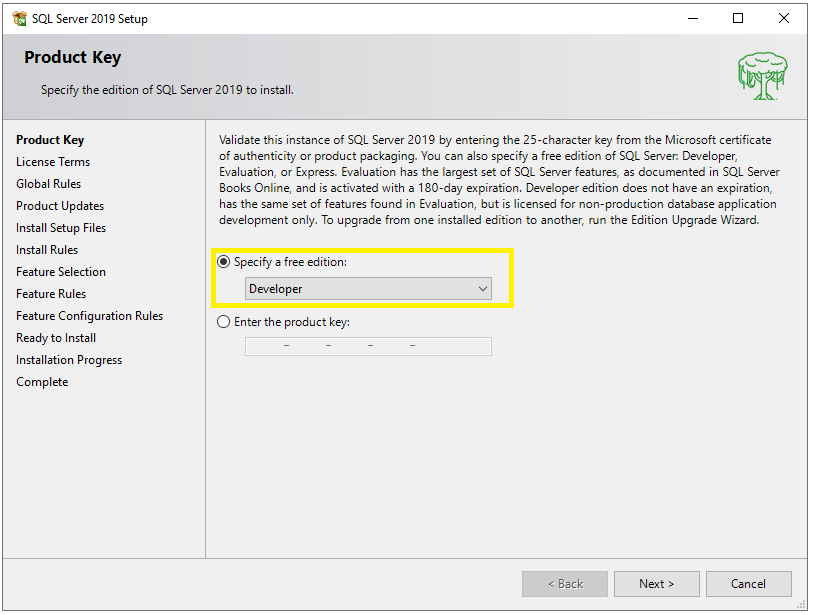
- On clicking above option, it’ll open SQL Server 2019 setup, as here we’re proceeding with Developer edition, select Developer as shown below and click on Next:
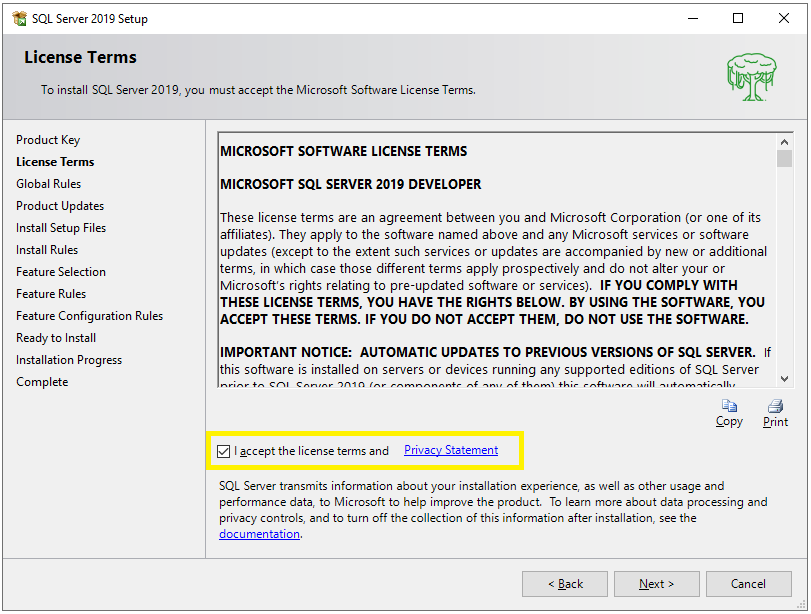
- Accept the license and click Next:
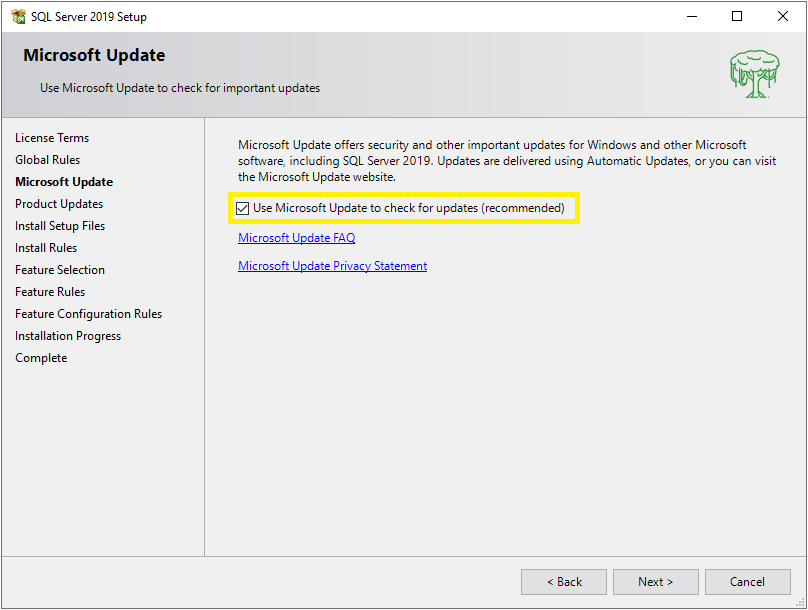
- You can select update option to check for updates and click Next:
- If an update is available then required file will be downloaded and installed in this section, once complete, click on Next:

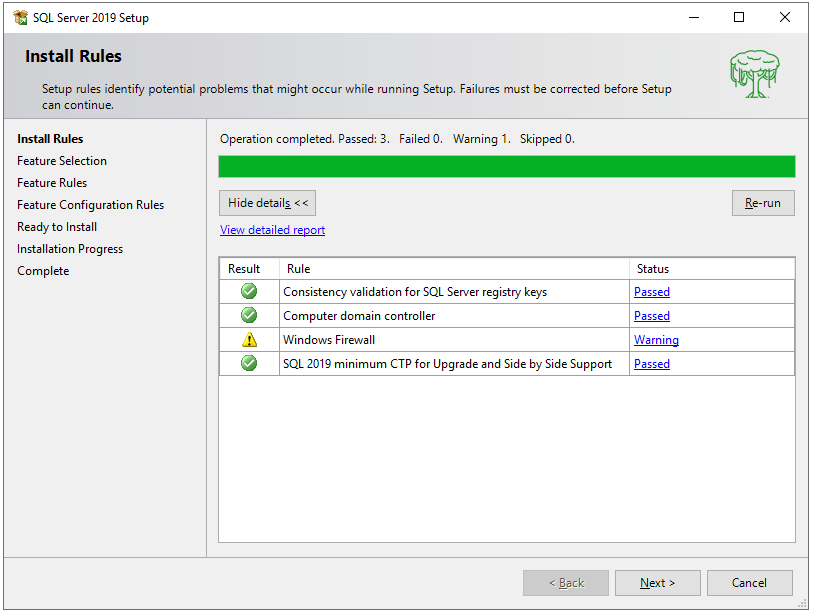
- Here are some rules that need to be validate by setup installer. You can ignore the warnings but any failures need to be fixed to proceed further:
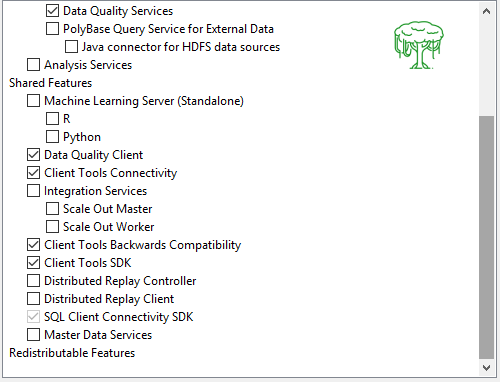
- It will show a list of features that you can select to get installed along with your MSSQL server installation and then click Next:

- If this is your first and the only instance then you can select Default instance or else select Named instance and provide a name for your instance in the field. Once done, click Next:

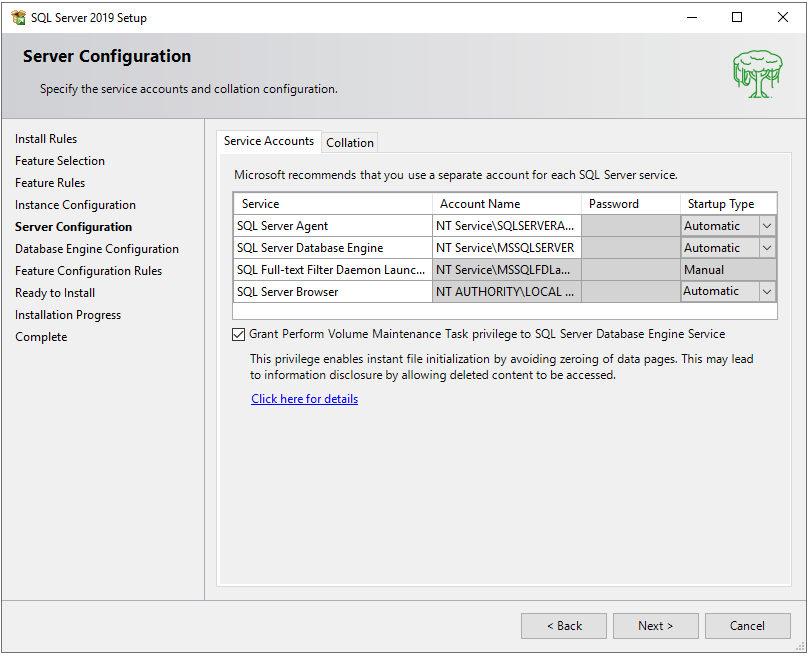
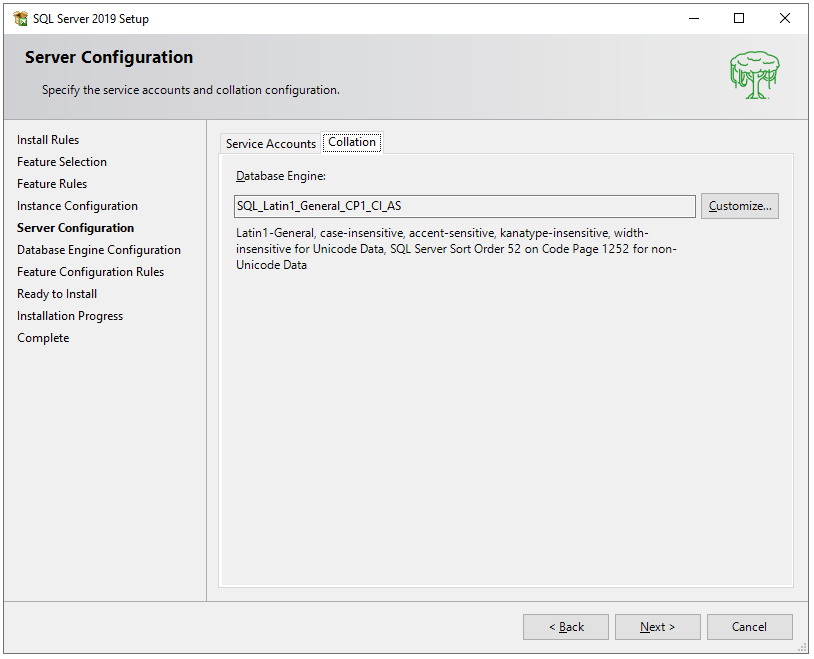
- Here we have two tabs:
- Service Accounts: Contains different services used for MSSQL service to function. Here you can manage service’s account and its startup type.
- Collation: Server level collation is set based on operating system’s locale, but you can customize it. By default, it is typically based on locale of the operating system.
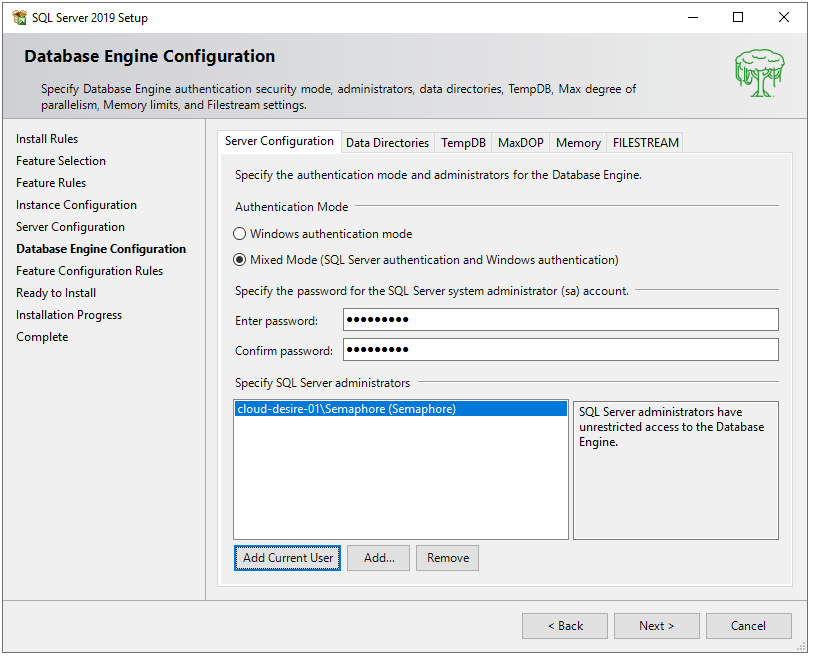
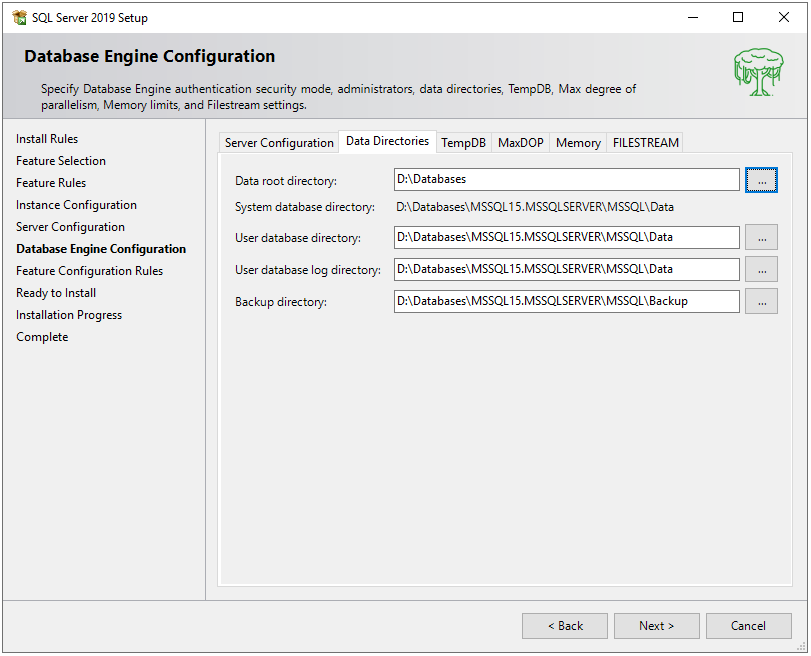
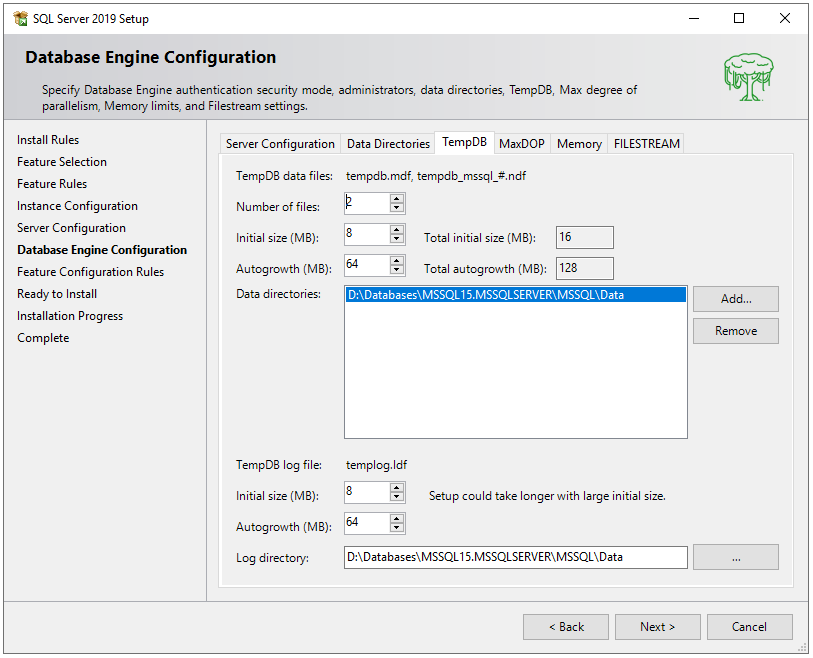
- Here we have six tabs:
- Server Configuration: You can choose what type of authentication you want, either windows authentication or Mixed mode. Also, you can activate the ‘sa’ account by providing the password. This account is the default account to login into MSSQL server. You can also provide an administrator to the MSSQL server through the options provided below.
- Data Directories: This contains all the paths where MSSQL server will store its stuff like data, database, database backup, etc..
- TempDB: Here you’ll see more controlled configuration where you can set the file sizes and its scaled size.
- MaxDOP: This stands for maximum Degree of Parallelism which means out of total number of CPU cores, how many cores you want to utilize for this MSSQL instance. Multiple cores simply help in processing multiple tasks parallelly.

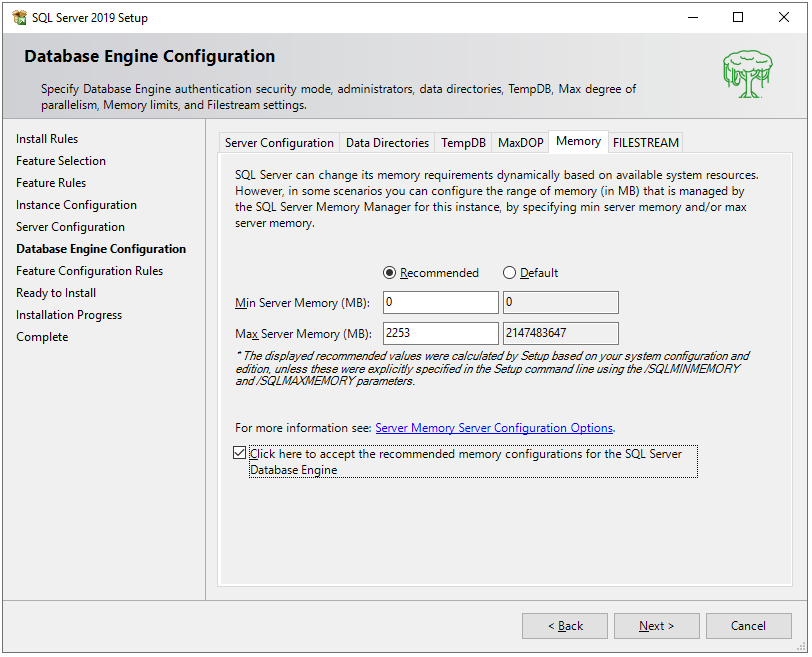
- Memory: MSSQL server can manage its memory dynamically but, in some cases, you can mention the minimum and maximum memory that should be used by MSSQL server.
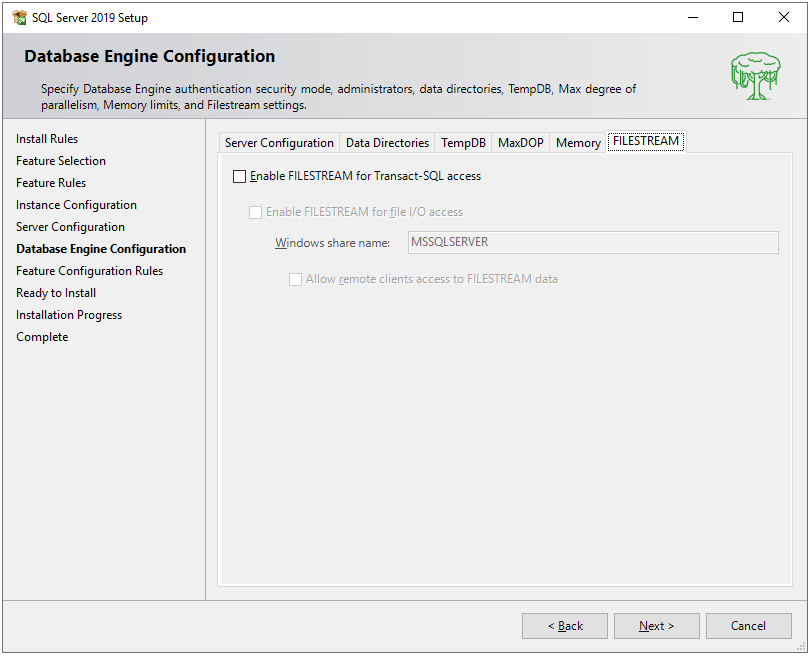
- FileStream: You can enable file stream for Transact-SQL access.
- Server Configuration: You can choose what type of authentication you want, either windows authentication or Mixed mode. Also, you can activate the ‘sa’ account by providing the password. This account is the default account to login into MSSQL server. You can also provide an administrator to the MSSQL server through the options provided below.
- Now under ready to install window, it’ll show you all the configuration and features you selected till now are going to install. Click on install to proceed:

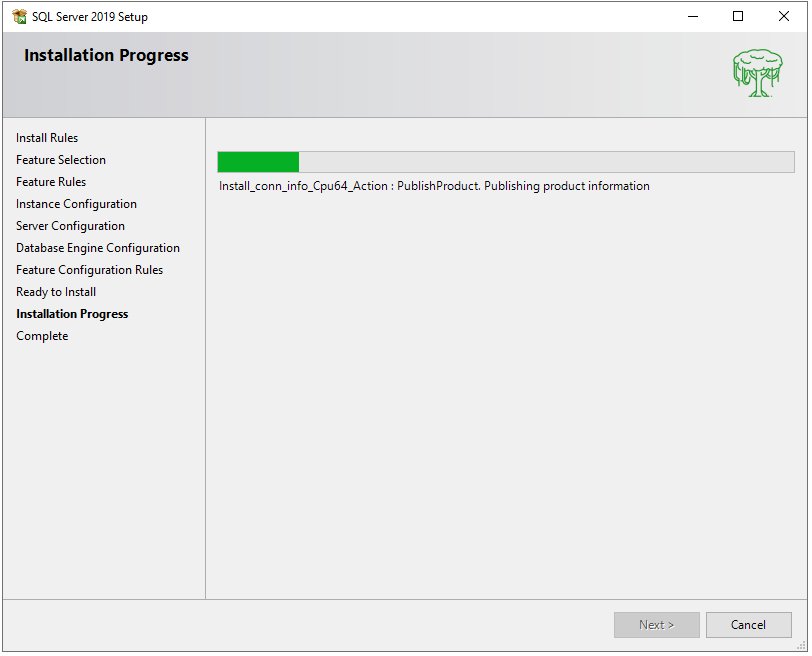
- This screen will show you the installation progress bar. Click on next when completed:
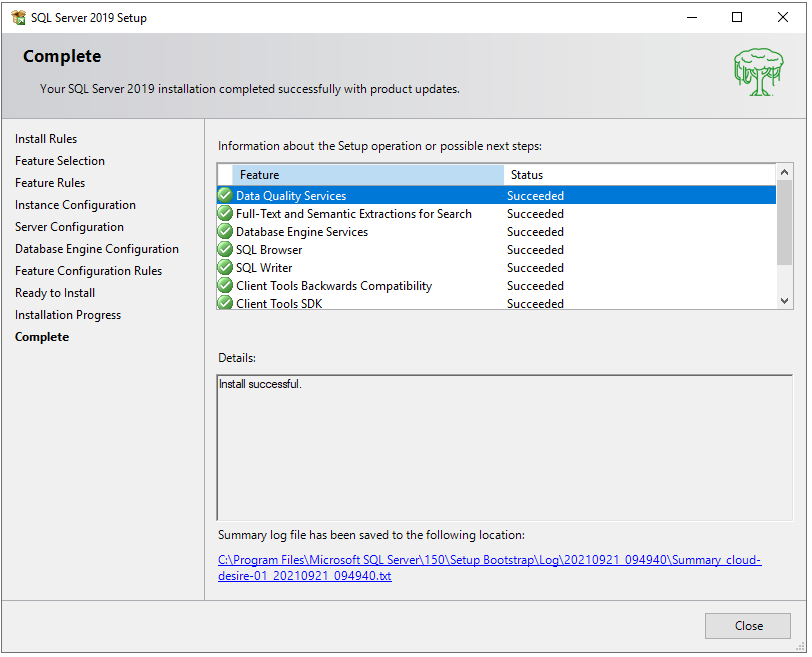
- At the end it’ll show you the screen of features list with their installation status.
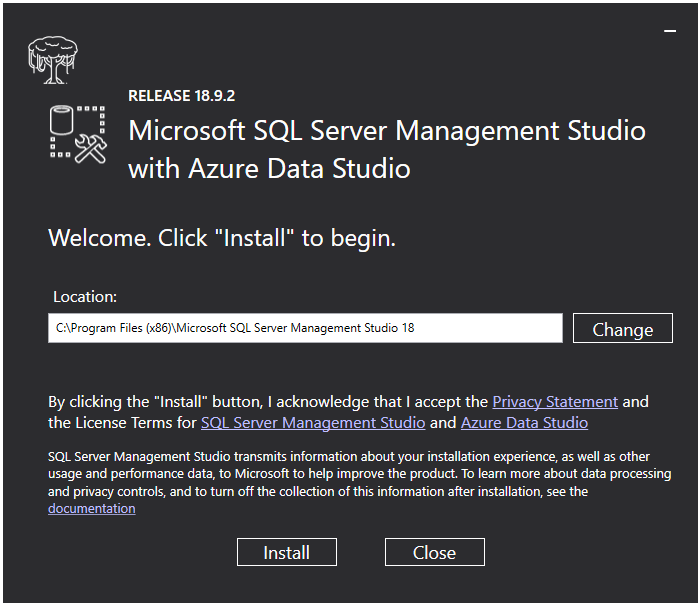
- Now, it’s time to install MSSQL Server Management Studio which is a tool through which we can manage our databases. Check the below link to download:
https://aka.ms/ssms/21/release/vs_SSMS.exe
Configure the installation path and hit next:
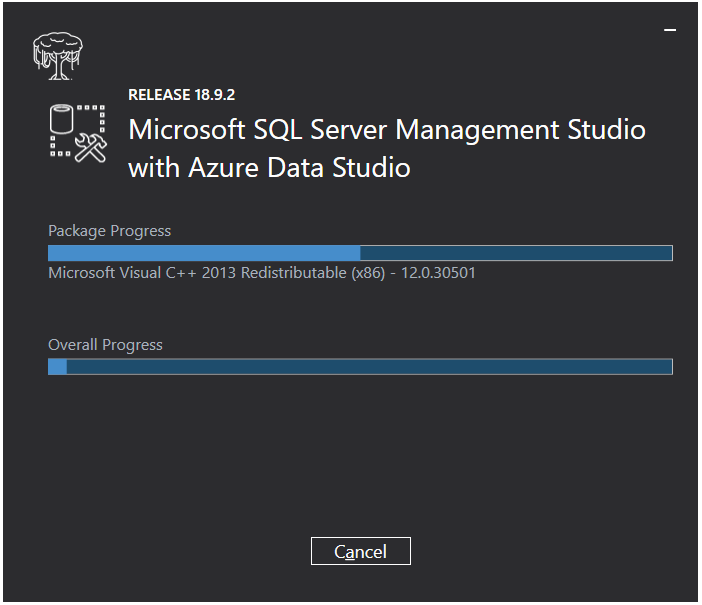
- It’ll start downloading the packages for installation:
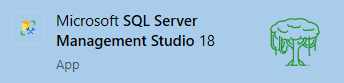
- Once above is done, you’ll notice below option in your windows start menu, click on that to open MSSQL server:
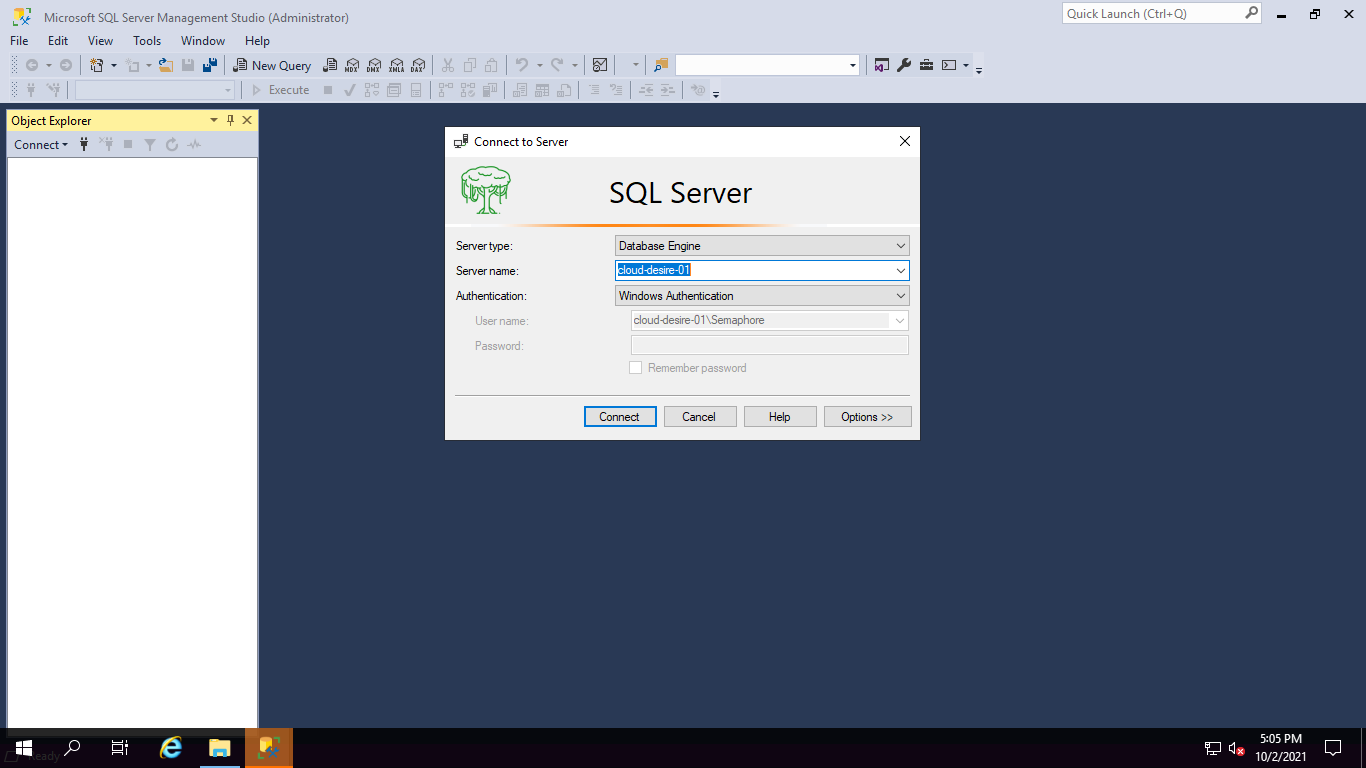
- It’ll show you login screen, in the authentication type – select windows authentication and enter your windows credentials to login:
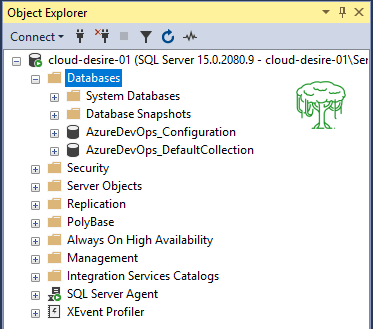
- After successful login, you’ll see your databases something like below:
CONGRATULLATIONS!! You have just installed your first MSSQL server. For more such articles, stay tuned with Bhramax.
Checkout below link for more information:

All rights are reserved.